
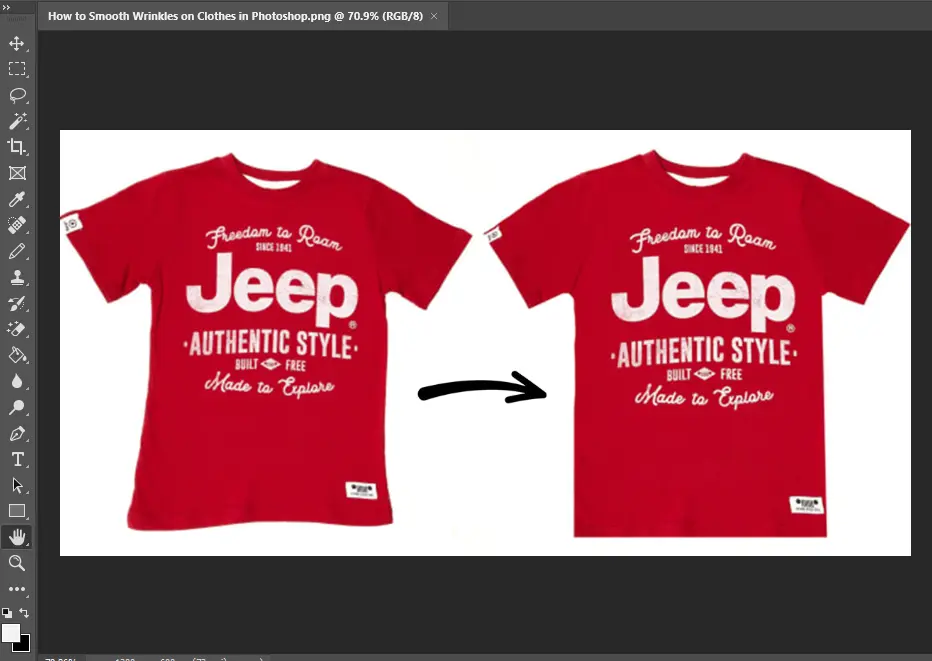
Wrinkles can mess up a great product photo. But, Photoshop has tools to fix this. This guide will show you three ways to smooth out wrinkles on fabric and clothes. You’ll learn about the healing brush tool, the patch tool, and the frequency separation method.
Key Takeaways
- Three effective methods for smoothing wrinkles on clothes in Photoshop are covered in the guide.
- The Healing Brush tool provides a manual approach to wrinkle removal, while the Patch Tool and Frequency Separation offer more automated solutions.
- The Patch Tool is recommended for fixing large areas with crisp wrinkles, and Frequency Separation can quickly smooth wrinkles across an entire garment.
- Retouching wrinkles by hand is emphasized to achieve a realistic result in product photography.
- The Spot Healing Brush Tool is a popular choice for editing out wrinkles, with adjustable settings and techniques for optimal results.
Introduction: Why Smoothing Wrinkles is Important
Wrinkles in fabric can make product photos look bad. They take away from the quality and look of the image. To fix this, photographers learn how to remove wrinkles in Photoshop. This skill is key for showing off clothes and textiles in a professional way.
Wrinkled Fabric’s Impact on Product Photos
When people look at products online, they want to see great photos. Wrinkles can make the product look less appealing. Using Photoshop to remove wrinkles helps make your photos look better. This makes your clothing photography, textile textures, and garment retouching look more professional.
The Subtle Art of Realistic Wrinkle Removal
Removing wrinkles is key for good product photos. But, you must do it carefully. Too much editing can make the photo look fake. The goal is to use Photoshop tools like the Healing Brush and Patch Tool to smooth wrinkles without losing the fabric’s natural look.
Method 1: Healing Brush Tool
The Healing Brush Tool is a great way to remove wrinkles in Photoshop. It gives amazing results but might take more time than some other methods. To use it well, pick the Healing Brush, set its size to about twice the size of the deepest wrinkle, and paint over wrinkles with smooth fabric areas. Keep grabbing new samples as you work to make the fabric look natural.
Selecting and Adjusting the Healing Brush
Begin by picking the Healing Brush Tool from Photoshop’s toolbar. Make the brush size about twice the width of the deepest wrinkle in your picture. You can adjust the brush’s hardness and settings for the best fabric wrinkle removal. Try different brush settings to find the most natural look for your image.
Sampling and Painting Over Wrinkles
After setting up the Healing Brush, sample smooth, unwrinkled fabric nearby. Then, paint over the wrinkled areas gently, letting the tool blend in the texture. Don’t over-paint to avoid unnatural-looking photoshop image editing and garment crease reduction techniques. Keep resampling new areas to keep the digital fabric texturing and photoshop retouching tutorials looking natural.
Method 2: Patch Tool
The Patch Tool in Photoshop is great for fixing fabric wrinkles. It lets you pick and merge smooth patches over wrinkled spots. This is perfect for big areas of wrinkles on clothes. The Patch Tool works best on clear, sharp wrinkles, letting you adjust how the patch blends with the rest of the fabric.
Setting Up the Patch Tool
First, set up the Patch Tool for smoothing out wrinkles. Choose the Patch Tool from the toolbar and tweak the Diffusion setting. This controls how the patch edges mix with the fabric. Try different Diffusion values for the best look when removing wrinkles from digital clothes.
Selecting and Patching Smooth Areas
With the Patch Tool ready, pick smooth fabric areas for patches. Outline the wrinkled part you want to fix, then drag the selection to a smooth spot nearby. The Patch Tool blends the area with the new spot, getting rid of the wrinkles. Use the Healing Brush Tool to fine-tune the edges for a natural look.
How to Smooth Wrinkles on Clothes and Fabrics in Photoshop
Wrinkled clothing can ruin the look of your product photos. Luckily, Photoshop has tools to fix fabric wrinkles and make clothes look smooth. We’ll show you how to remove wrinkles in Photoshop to improve your photos.
The Healing Brush is great for getting rid of fabric wrinkles. Adjust the brush settings to blend over wrinkles smoothly. The Patch Tool is also handy, letting you copy smooth fabric areas to wrinkles.
The Frequency Separation technique is a powerful method for smoothing wrinkles. It separates the image into color and texture layers. This way, you can fix wrinkles without changing the fabric’s color or shine. With these Photoshop tools, you can make clothes look perfect in your photos.
Remember, the goal is to keep the fabric looking natural. Pay attention to lighting and color balance for realistic results. Try different techniques to find what works best for you. With practice, you’ll be removing wrinkles like a pro.
Let's Try Our Cloth Retouching Services!
Method 3: Frequency Separation
Frequency separation is a top-notch photo editing trick great for smoothing wrinkles on clothes and fabrics. It splits an image into color and texture layers. This lets you tweak each part separately without harming the fabric’s look.
Creating Color and Texture Layers
First, copy the background layer in Photoshop. Use one layer for color and the other for texture or edges. Blur the color layer to focus on fabric details and smooth wrinkles.
Applying Frequency Separation
Next, separate the layers further. Add a Gaussian Blur to the color layer to remove fine details. The texture layer keeps the fabric’s edges and details sharp.
Smoothing Wrinkles on Separated Layers
Now, work on the isolated layers. Use the Healing Brush or Patch Tool to fix wrinkles on the texture layer. This keeps the fabric’s color and shading right while removing wrinkles for a perfect look.
Common Issues and Tips
When you’re removing wrinkles from clothes in Photoshop, you might run into some common problems. One big issue is getting accidental patterns on the fabric. To fix this, adjust your editing brush’s size and hardness. Also, play with the source point and distance to blend the fixed areas well with the rest of the fabric.
Maintaining Luminosity and Texture
Keeping the fabric’s natural shine and feel is also key. Too much smoothing can make it look fake. To keep it real, try different blend modes and adjust the opacity. Make sure your fixes match the fabric’s original patterns and textures.
By tackling these issues and using the right techniques, you can make your product photos look great. This will make your images more appealing and professional.
Advanced Wrinkle Smoothing Techniques
In the world of digital clothing de-wrinkling, there are advanced techniques to make fabric look smooth in Photoshop. These methods build on the basics to give you a natural-looking result.
The Clone Stamp Tool is a great tool for removing wrinkles. It works by copying smooth fabric areas to cover wrinkles. Try different brush sizes and settings to match the fabric’s texture.
Using blending modes can also improve your wrinkle removal. Try Linear Light or Overlay modes to make the fabric look better. This method keeps the fabric’s texture while removing wrinkles.
The Dodge and Burn technique is good for a detailed fix. It lightens or darkens fabric areas to make it smoother. This method needs care but can change how the fabric looks.
When smoothing out wrinkles, it’s important to keep the fabric looking real. Mastering these tools and techniques will make your wrinkle removal in Photoshop look amazing. You’ll get results that impress everyone.
Pre-Production: Preventing Wrinkles
Getting rid of wrinkles before you start shooting can save you a lot of time and effort later. Using techniques to reduce garment creases and digital fabric texturing makes your subjects look great right away.
It’s important to steam, iron, or press clothes and fabrics before a photoshoot. This helps reduce the need for a lot of Photoshop work later. Also, picking fabrics with smooth textures makes photography and enhancing images easier.
Preparing your subjects early lets you focus on taking amazing photos. You won’t spend too much time removing wrinkles later. This approach improves the quality and realism of your images.
Success in clothing photography isn’t just about Photoshop skills. It’s also about managing the pre-production process well. Use techniques that prevent wrinkles to create professional-looking images that grab attention.
Professional Retouching Services
If you don’t have time or skills for fabric wrinkle removal in Adobe Photoshop, consider professional retouching services. These services have experienced editors who can smooth out wrinkles in your product photos. They ensure your photos look high-quality and polished.
Our research found 4275 customers who loved the photo editing services from “Color Clipping”. Their experts use Adobe Photoshop 2022 to remove wrinkles and folds. This makes your garment images look seamless and appealing, which can boost sales.
Color Clipping offers many fashion retouching services, like body editing and beauty correction. They also enhance colors and remove spots, wrinkles, and other flaws. Their techniques include dodge and burn, and the spot healing brush.
They don’t just fix wrinkles. They also minimize pores, remove scars, and enhance makeup. Their clients include fashion photographers and business owners who value their skills in hair removal and body editing.
For professional-looking product photos, try Clippingpath’s retouching services. Their team can make your photos look smooth and appealing. This can help attract more customers and increase sales for your business.
Other Tools for Wrinkle Removal
Photoshop has more than just the Healing Brush, Patch, and Frequency Separation for smoothing wrinkles. Tools like the Spot Healing Brush and Clone Stamp Tool are great for fixing fabric imperfections. They let you blend pixels to remove wrinkles in clothing photos and textures.
Spot Healing Brush Tool
The Spot Healing Brush Tool is great for fixing small wrinkles and marks. It takes pixels from around the area and blends them together. This makes it easy to remove fabric flaws without changing the image’s look or feel.
Clone Stamp Tool
The Clone Stamp Tool is perfect for removing complex wrinkles. You can pick a smooth fabric area to sample and then paint over the wrinkles. This tool makes the fabric look natural and high-quality in your photos and projects.
Conclusion
Learning to smooth wrinkles in clothing and fabric photos is key for product photography and fashion digital editing. This guide has shown you how to use tools like the Healing Brush, Patch Tool, and Frequency Separation method. These techniques help remove wrinkles and make your photos look professional.
Whether you’re doing the work yourself or hiring a service, these strategies will help you get perfect, wrinkle-free images. Photoshop offers many tools and methods for removing wrinkles. You can use brush size, hardness, and spacing for the best results.
The Content-Aware option, Healing Brush, and Spot Healing Brush give you detailed control. The Color Replacement Tool and Curves adjustment layer can fine-tune your work. By using these how to smooth wrinkles on clothes and fabrics in photoshop, image editing, wrinkle removal tools, fabric texture smoothing, and clothing photography retouching methods, you can make wrinkled garments look flawless. This skill will improve your image editing and help you create high-quality, wrinkle-free images that grab attention.